

Adjusting and Realigning Photo Eye Sensors or ISB’s
ISB’s or Infrared Safety Beams, also called photo eye sensors, are an essential safety feature of garage doors. These sensors are what keep the garage door from closing when someone or something is in its path. When the sensors start malfunctioning, it is not only frustrating but is dangerous as well. If your garage door is closing when it shouldn’t or if it won’t close all the way and goes back up, you may need to realign the sensors or call your local garage door service to have them repaired or replaced.
Five Steps to Align Your Garage Door Sensors
Before jumping in to make any adjustments, you should check that nothing is blocking the sensors. Even the smallest thing blocking their path can activate the reverse function. If there is nothing evident in their way, you should next check that the sensors are clean and clear of debris. If your photo eyes are dirty or have cobwebs or other debris covering the sensors, this could also be the reason they aren’t working correctly.
The second thing you should inspect before starting the realignment process is to check the LED lights on the sensors. If one sensor is lit, but the other is not, it may have been bumped. Simply turning the sensor with your hand until the beam aligns and the LED light comes back on might do the trick.
If after performing these initial checks, the sensors still aren’t working, you can move on to the following steps for realigning the photo eyes:
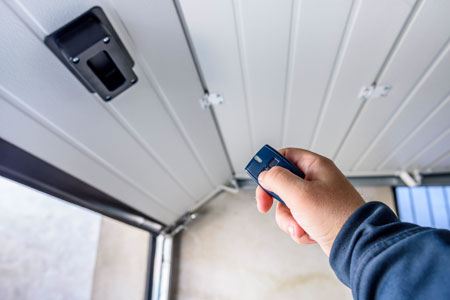
Disconnect the Power
This is a precautionary measure to take before starting the realigning process to ensure that the door does not activate while you are working on the sensors. You wouldn’t want the door to start closing while you are in its path, working on the sensors. To disconnect the door from the opener, pull down on the release handle – usually a red rope and handle hanging down from the opener.
Step 1: Loosen the Sensor Screws
There are typically a couple of screws or bolts that hold the sensors in place in their brackets. With a screwdriver, loosen the screws enough that you can adjust the sensors. Do not loosen them so much that the sensors fall out of the mounting brackets. The sensor could also be held in place with a single winged nut. Turning it counterclockwise should loosen it, but again, don’t loosen it too much. You want it loose enough that it can be adjusted, but not so much that it will come out entirely.
Step 2: Realign and Level the Sensors
This part will potentially take some playing around until you can get both sensors level with each other. Start by moving the sensors in and out or up and down until the LED lights on both sensors are lit, indicating that they are aligned. If you want to test that they are truly level, you can tie a long piece of string from one bracket to the other. You will first need to slide the sensors down and out of the way as far as they will go in the bracket. Then tie the string from one bracket to the other at the point where the sensors will line up when you move them back up. Make sure the string is taut and then use a level. Move the brackets as needed until the string is level, and then move the sensors back into place and remove the string.
Step 3: Secure the Sensors
Once you have the sensors in a place where they seem to be aligned, tighten the screws or nut to ensure they secured. Do not tighten them so much that it will be challenging to loosen again – you might have to play around with the alignment again after testing the door.
Step 4: Test the Garage Door
 When the LED lights are lit on both sensors, it’s time to test the door. Connect the power to the garage door opener and use your remote or wall-mounted button to activate the door. If it appears to go up and down without any issues, then your job is done.
Step 5: Repeat the Aligning Process
If the door is still having issues, don’t give up just yet. Loosen the sensors and try again. You might not have tightened them enough last time after aligning them, and they could have fallen out of place when you activated the door.
What to Do If the Garage Door Still Isn’t Working
If the garage door is still giving you trouble after repeating the aligning process, it’s probably time to call a professional. The sensors might need replacing entirely, or there could be another maintenance issue causing the problem. You should not attempt to make any repairs yourself, as you could cause further damage or injure yourself in the process.
How All About Doors in Portland Can Help
If you are having issues with your garage door, call to have one of our technicians perform a thorough inspection to diagnose the issue. With over 32 years of experience, the team at All About Doors can handle any garage door repair or replacement you might need. We provide a range of garage door services for customers in the Portland metro areas. Call us today to speak to a professional and set up an appointment to have your garage door inspected!